Final Project Concept (Pivot!)

As we went through our last few classes for Interface Lab we began to learn about many more new ways to create physical interactions to P5.js. This started to spark all sorts of new ideas in my head so I decided to challenge myself to build something different and new. I set about this process by playing around with different sensors to understand what the different configurations can do. I had used the rotary potentiometer in one of the labs to create a device that could move a ball on 2 axis on the screen in P5.js and I thought that it might be cool to create a device that used different types of potentiometer to control a game in P5.js, A game with a twist!

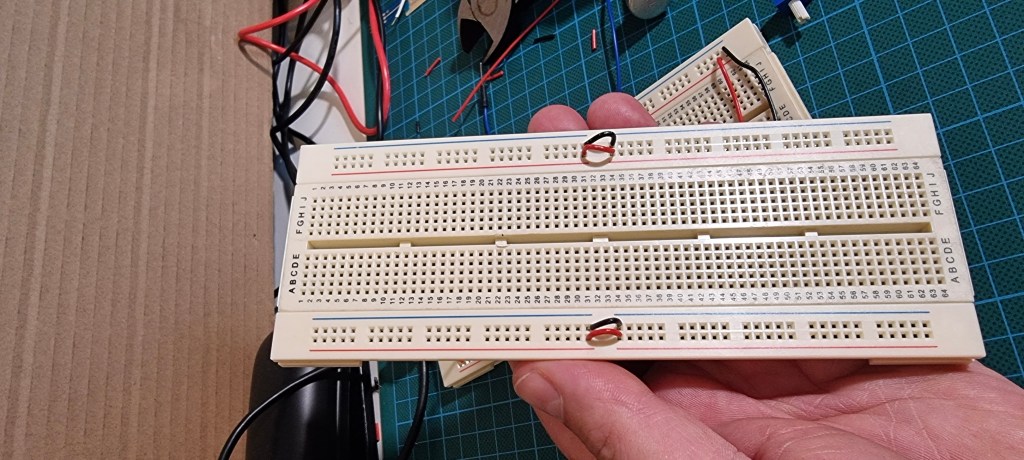
The first thing I did was to ensure that the input from the Arduino would communicate with the P5.js sketch by way of the P5.js serial app. This allowed me to begin working on a P5 sketch that could be manipulated with the sensors attached to the Arduino. I built the setup we learned from David in class and immediately ran into problems. I had not connected the lower part of the bread board to the upper part of the bread board and nothing on the lower part would function! Luckily I got some help with this and I was able to move forward.

Once this setup was functioning I was able to swap out sensors to see what would or would not work. Previously I had used an LDR sensor in place of and FSR sensor which I was able to explore concept ideas with however the rotary potentiometer required a bit more work to swap out if I wanted to use an LDR or FSR sensor for that matter.

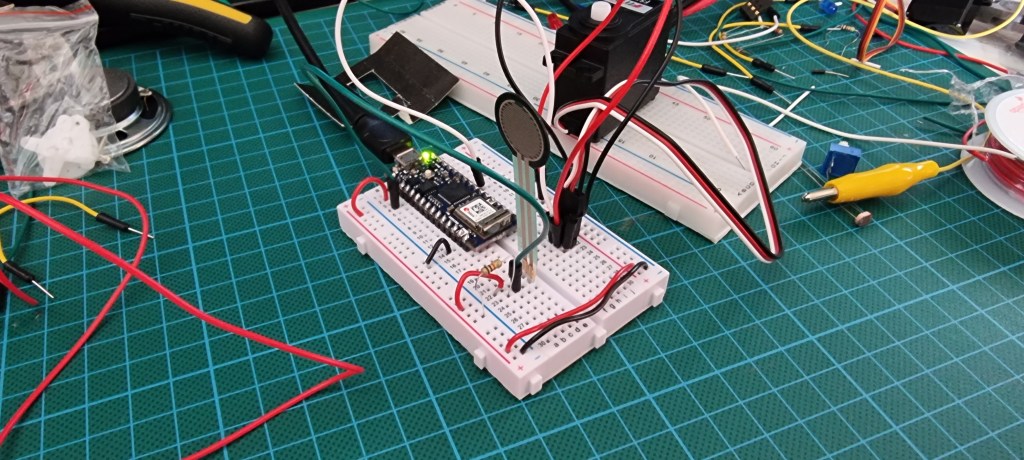
It was about putting a resistor in line for the power to the sensor and setting it up a little differently. With a lot of effort I got the FSR to connect. At this stage I had 3 different inputs, a rotary potentiometer, an FSR and a button all connected next I had to make sure that there was reading coming from all three. Opening the serial port and creating print values in the Arduino IDE I was able to get a read out that let me know the sensors were functioning. I wanted to use the FSR for an idea I had but I did not realize how much work would be involved in executing it!

Now I had my Arduino set up, I had my sensors giving a reading, I had the Arduino connecting to P5.js and I had a basic sketch working that was acting based on the input from the sensors. What I wanted to create was a game that was a little like pong except in reverse. Basically a paddle bounces up and down the y axis of the screen and the objective is to get a ball past the paddle into the end zone to win the game. Except you can never win this game! More on this later!

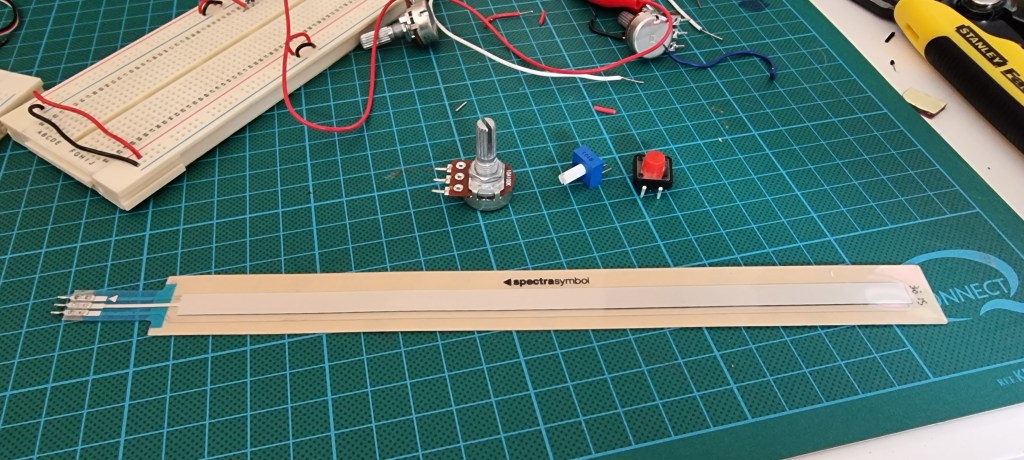
As part of the losers game I needed to ensure that there was no way for the player to get the ball to the end zone. How I was going to achieve this was by creating an enemy that never lets you get the ball to the end zone. This was going to be the second part of my Arduino struggle. It was also the reason I used the FSR to create the input for moving the ball along the x axis. Pressing the FSR moves the ball along the x axis to the end zone. Releasing the pressure or force on the FSR the ball returns to the other end of the screen. I needed to create an interaction that stopped the FSR being effective this is when I turned to my servo motor!

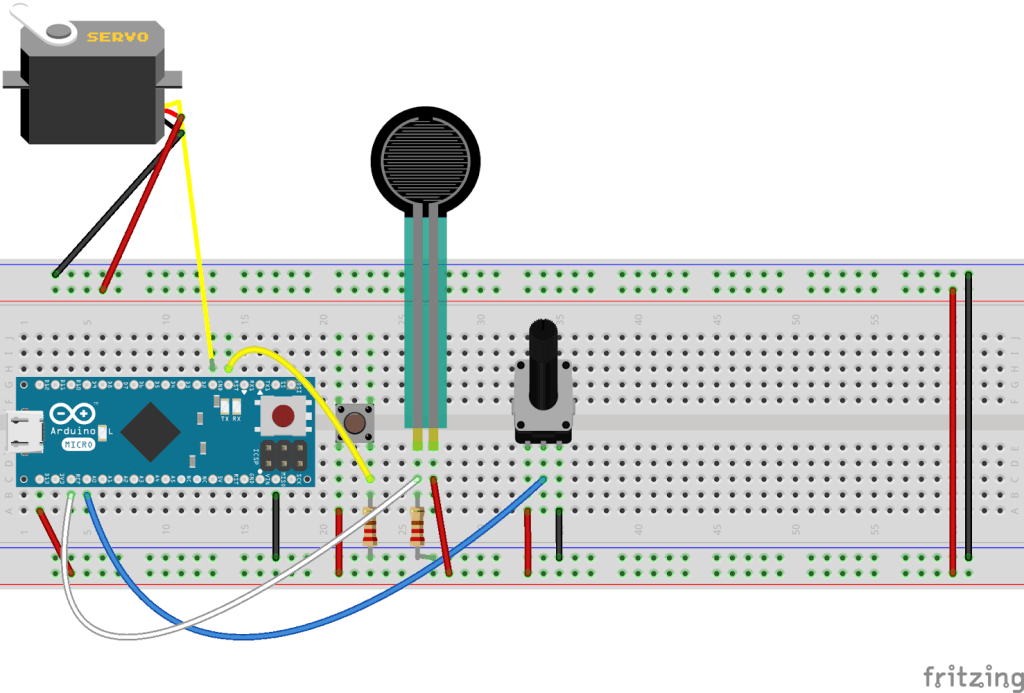
I hooked up the servo on another pin on the Arduino and then connected the FSR to the Arduino too. Fairly basic but still a job for me given my limited experience. I got the FSR to activate the servo and then began trying to figure how to map it correctly. This took a bit of trial and error. Then it was about transplanting this code into the other Arduino sketch in a method I refer to as the Frankenstein. This is where I cobble together a bunch of code and hope for the best and then when it inevitably doesn’t work try to solve the problems through the process of elimination.

I managed to get the Frankenstein monster to work but it was not working with the P5 sketch! Many hours and a lot of head scratching I went back to tutorials on how I could get it to work. My big issue was forgetting to put in the correct characters and switching between Arduino IDE and P5.js caused me to do things incorrectly. I found slowing down to a snails pace and checking everything several times made things more smooth, slow is smooth and smooth is fast! Well at least I hope that’s how it will go in future.

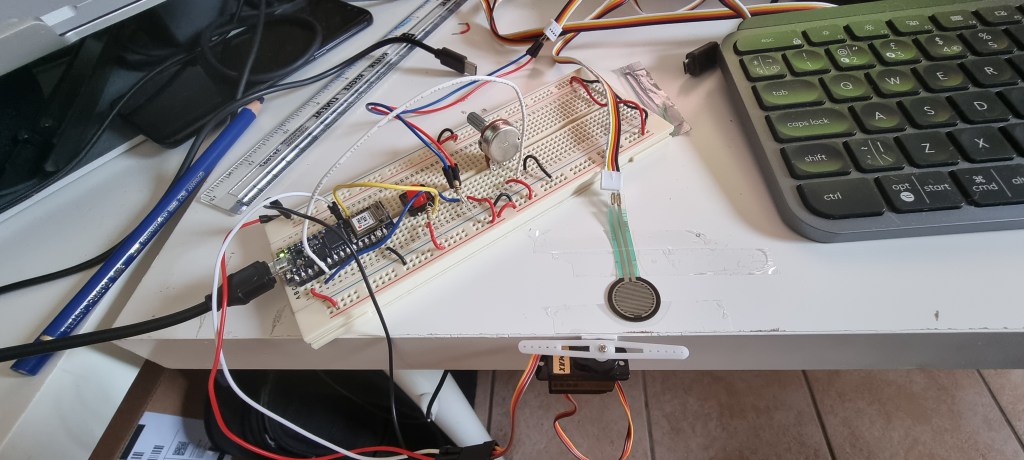
After some disasters and misfires with the code I got the FSR to activate the servo whilst simultaneously moving the ball in P5.js. I then made a very basic prototype of the system which I taped to my desk to test. I had a family member try it and seen the flaws in the interaction with the physical element. Next stage is to get the mapping for the FSR and servo to correspond with the distance the ball moves. Once this has been achieved I can start creating the enclosure.

UPDATE

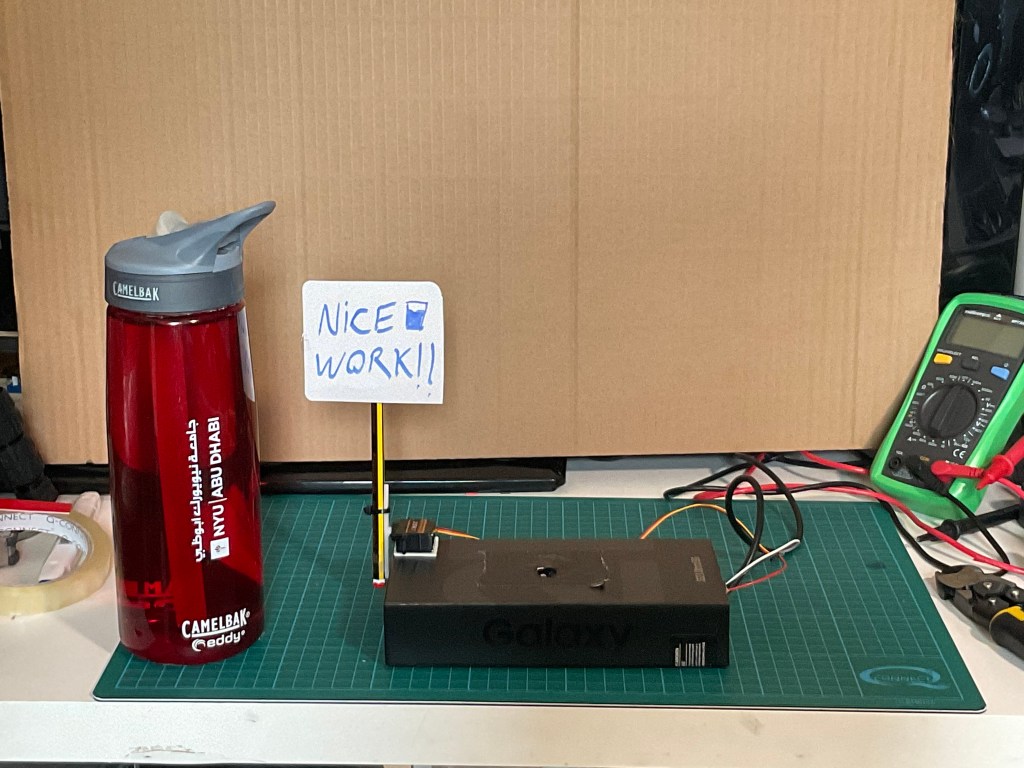
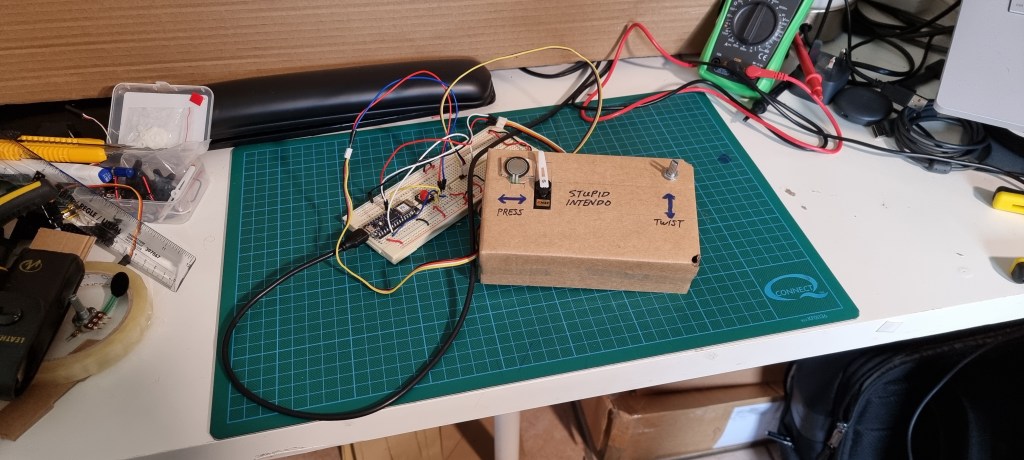
I got the enclosure worked out and attached the servo, potentiometer and FSR to the enclosure. I tried to take into account ergonomic considerations.

Once I had managed to do this I had to test the game again. There is a lot of interference from the cables being all bunched up inside the enclosure but it was still as frustrating to play as intended!

Finally some instructions on how to use the controller were the final touches.

This has been a really fun project to work on, I really enjoyed the use of the different skill sets we learned over the past 5 weeks and consolidating the efforts into this piece of whimsical art.

Final Project Concept

For my final project I am hoping to build off the positive reinforcement water bottle stand. I want to look at adding a way to communicate the act of drinking water with p5.js.

This way the physical action of drinking water can not only have a physical out put by way of the servo motor but also via the screen of my computer.

Ideally this would have its own screen so it could be used in isolation of a computer.

I see the device working in the following way.

1.

On picking up the water bottle to have a drink the sensor is exposed to light which activates the servo. The servo then rotates showing the nice work! sign.

2.

When this occurs the Arduino also sends an output to an LED as well as possibly a speaker. These could be 2 more signifiers of a successful interaction with the device.

3.

The Arduino will also via serial port interact with a sketch in P5.js.

4.

The sketch on the screen will be of a fish tank with some fish in it swimming. Every time the bottle is picked up the water in the fish tank depletes and then reminds the user to refill their bottle.

I have a couple of ideas on how to achieve this.

What will be required for this will be:

Arduino Nano

LEDs

Speaker?

Servo motor

Cardboard

Batteries?

Jumper cables

Resistors

LDR sensor

I hope to achieve a digital and physical interaction from this device and perhaps see if the same concept be used in different ways for different types of scenarios.

Interface Lab: working hard on hardware! I/O project.

For this project I continued on from labs we were assigned in the previous week. After lots of trial and error I managed to get some things working.

I enjoyed trying to combine different sensors with outputs. I did run into several problems trying to get outputs to function and always checked input sensors via the console to see if there was any reading. Once I knew these were functioning it was about trying to get an output to react to the sensors reading!

There were a few issues with servos not functioning but I was able to get a hold of a smaller servo which could function off the Arduino Nano. I got this smaller servo to work with the pressure sensor and with the LDR sensor. I though the LDR sensor was pretty cool in place of the pressure sensor and began thinking about ideas to use it with.

One of the things I forget to do quite regularly is drink water. I thought what if I could create a positive reinforcement habit loop by creating a device that gives me a compliment every time I have a drink. I decided I would use the LDR as an input and the servo as an output to create this device.

I used the following to build this:

1. Servo
2. LDR
3. Arduino Nano
4. Breadboard
5. Jumper cables
6. Resistor
7. Empty smartphone box
8. Pencil
9. Double sided and regular tape
10. Cable tie

I set up the Arduino as per the diagrams and code here:

https://itp.nyu.edu/physcomp/labs/labs-arduino-digital-and-analog/servo-motor-control-with-an-arduino/

I changed out the pressure sensor for the LDR and with some adjustments to the code got the range of movement for the output where I needed it to be.

I then created a rudimentary enclosure frame the smartphone box and put all the Arduino setup inside of it leaving a hole so the LDR would be exposed. Once this was done I attached the servo to the outside of the box to test it. When I was happy with this I removed the plastic attachment form the motor, attached a pencil to it and made a small sign/flag to attach to the pencil, then I attached this sub assembly to the servo and it was ready to test.

With a few final tweaks to the code to make sure the sensor was in the correct range I tested the final product.

I think it would be cool to advance this project more by having it log interactions that shows how often the bottle was lifted up and then weighs the bottle when it is put down so you can see how much water is being drank. It may also be useful to put a small note board on the pencil that has reminders for tasks. Then each time you drink some water you check your list!

Interface Lab: working hard on hardware! Week 2 Labs

This weeks adventures in hardware proved to be many hours of trial and error, mostly error.

After spending too much time trying to get speaker to work with Arduino Nano 33 I finally gave up. It wasn’t for the lack of trying however. I though a lot of it was to do with wiring to the speaker which is an 8 ohm unit and here’s an example of how I tried to wire it up.

It turns out that there were some issues around the Nano not being able to drive the speaker! I moved on to trying out the next part of the assignment as I had expended a lot of time on this.

I went on to trying to attach the servo to the Arduino. I got the servo attached but it also would not function. Based on the prior experience of trying to attach the speaker I cut my losses with the servo and got hold of a smaller servo after ordering online and came back to it a day or 2 later.

Good news! The smaller servo worked! Awesome. Here’s a video of the pressure sensor working with the motor.

I tried out the LDR sensor with this set up to and it worked. I now have a few options to connect the servo and the sensors. This will help with coming up with some ideas for the next assignment which is an I/O project!

Sensing where Sensors are!

On the average day I will interact with many, many sensors in different objects. I am looking at devices and objects I use outside my phone or other technologies that have sensors and are immediately apparent. I have chosen to look at the other interactions I have with sensors or devices that have sensors on a daily basis.

The first device I pick up and put on in the morning is my fitness band. I put it on and it is now tracking my movements and logging steps. Inside the device is an accelerometer a gyroscope and a sensor that can track heart rate too. I don’t wear it at night so it doesn’t track my sleep but I do wear it during the day and it gathers step count and heart rate data throughout the day. It uses a small touch screen to interact with onscreen menus too. 

Throughout the day I will interact with the fitness band on several occasions. 

A couple of times a day I will need to run errands and get into my car to do so.

Approaching the car there are 2 ways to gain entry. By pressing the button on the keyfob or when you are close to the car placing your hand on the door handle activates a sensor that knows the fob is in close proximity and unlocks the car.

Once I have opened the car I get in and transfer my wheelchair into the passenger seat. I have to be careful how I place the wheelchair as a sensor inside the seat detects if there is something on it and will set off a seat belt warning if the seat belt is not on. This is very annoying as it is impossible to get the seatbelt over the wheelchair. Positioning is key to ensuring the alarm does not sound. 

Then I put on my own seat belt, adjust the seat and start the engine. If it has been raining or is raining as can be the case a lot of the time in Ireland the sensor in the wind screen will automatically activate the wipers clearing the windscreen. It will repeat this until the windscreen is clear. 

Engaging reverse gear the screen in the center console shows a view of what’s behind the car via a camera sensor mounted in the rear boot/trunk door. There is also proximity sensors front and rear on the car that give feedback audibly when you approach obstacles. 

Once I reverse out of my drive way I engage first gear. The gearbox is automatic and in a modern car I believe that this is electronically operated. The sensor detects the position of the gear stick and engages the transmission which inturn when the accelerator is pressed propels the vehicle forward under initially the electric motor and at higher speeds the petrol engine as the car is hybrid. 

As I am driving there are dozens of sensors all working at the same time to ensure safe driving of the car. Proximity sensors detect vehicles behind as well as infront of the car, wipers work automatically if it rains and on entry and exit of dark areas such as tunnels or at night the headlamps automatically engage by way of sensors detecting light levels. Detecting the light level also changes the screen of the dashboard interface to darkmode or light mode based on the lighting conditions.

When I get to a motorway/highway I have the option to engage dynamic radar cruise control and lane assist. My car will accelerate and decelerate based on the speed of the car I front and keep a specific distance to the car in front based on my initial input. It will do this until it reaches a max speed threshold I have also put into the cruise control the radar for the cruise control is situated behind the badge on the front of the car.

Lane assist detects the lines and barriers on the roadside and steers the car within those lines. You must maintain a grip on the steering wheel but it does relieve some effort in steering. Taking your hand of the wheel the car will audibly alert you to grab the wheel. The sensor used for this is positioned just behind the rear view mirror at the top of the windscreen.

When I get to my destination I will park the car, again the proximity sensors in the front and rear of the car give feedback to let me know how close I am to an obstacle and return an audible tone that tells me. On reversing the rear camera kicks into action again with an overlay giving me the best path to obstacle avoidance as I reverse.

Once parked I then shut down the engine. I open the door and left my wheelchair out and assemble it. I then transfer from the car to my wheelchair. One habit I used to have was once parked I would open the door of the car and then shut down the engine when I had the parking brake engaged. Then I would transfer to my wheelchair. I noticed that the car would start to emit an alert when I did things in this sequence. I think it is to alert the driver to the fact that the door is open in case they leave the vehicle unattended. Once I figured this out I knew what sequence to do in order to prevent it. Locking the car is done by either pressing lock on the key fob or touching the sensor on the door handle. The car will also give an alert if the key is inside the car when you try to lock it or if the key is not present when you try to start it.

There are probably dozens more sensors all working with each other and creating outputs that manipulate my actions into the direction of intent for correct use of features and safe driving. The ones mentioned in this post are the ones that appear to be most obvious to me when driving the car.

One of the more awesome sets of sensors I have interacted with were those positioned inside an exoskeleton when I walked for the first time in 15 years. I am paralyzed from the chest down and have been since a mountain biking accident which ended my career in the military.

With the relevant adjustments made to the exoskeleton to suit my body I position myself beside the exoskeleton and then transfer myself across to the chair it is sitting on. Then with the help of the staff at DCU sports campus the straps are put in place around my legs, waist and chest.

Once this is done a walking aid is placed in front of me and one of the physiotherapists powers on the exoskeleton. There is an audible countdown and the physiotherapist warns me of the exoskeleton standing me up. The motors and actuators engage and then I am lifted to the standing position.

The next stage is to begin taking a step, in the foot plates of the exoskeleton are load sensors. When I lean to one side and slightly forward the load sensor detects the difference in pressure and then activates the motors and actuators in that leg of the exoskeleton to move my leg. So when I lean left and slightly forward the exoskeleton lifts my right leg in a stepping motion. Once I have began to do this in sequence the speed can increase. There is also accelerometers and gyroscopes keeping the position of the exoskeleton corrected and to manage speed for safety purposes.

The physiotherapists also have control of the speed of the motor and actuators reactions to maintain a walking pattern. It is a strange sensation to use the exoskeleton and was incredible to walk again albeit with an aid for the first time in 15 years.

Once the session is over I have to be positioned in-front of a chair and the exoskeleton then by way of the remote control proceeds to the sitting position. I am unstrapped and can return to my wheelchair.

There are so many sensors acting and reacting in real time to our inputs and changing the way we interact with the world through their outputs. As they are more and more ubiquitous we begin to expect certain behaviors from objects we interact with. They are empowering people to engage in new and meaningful ways and in a lot of instances giving back something we don’t get any more of, time!